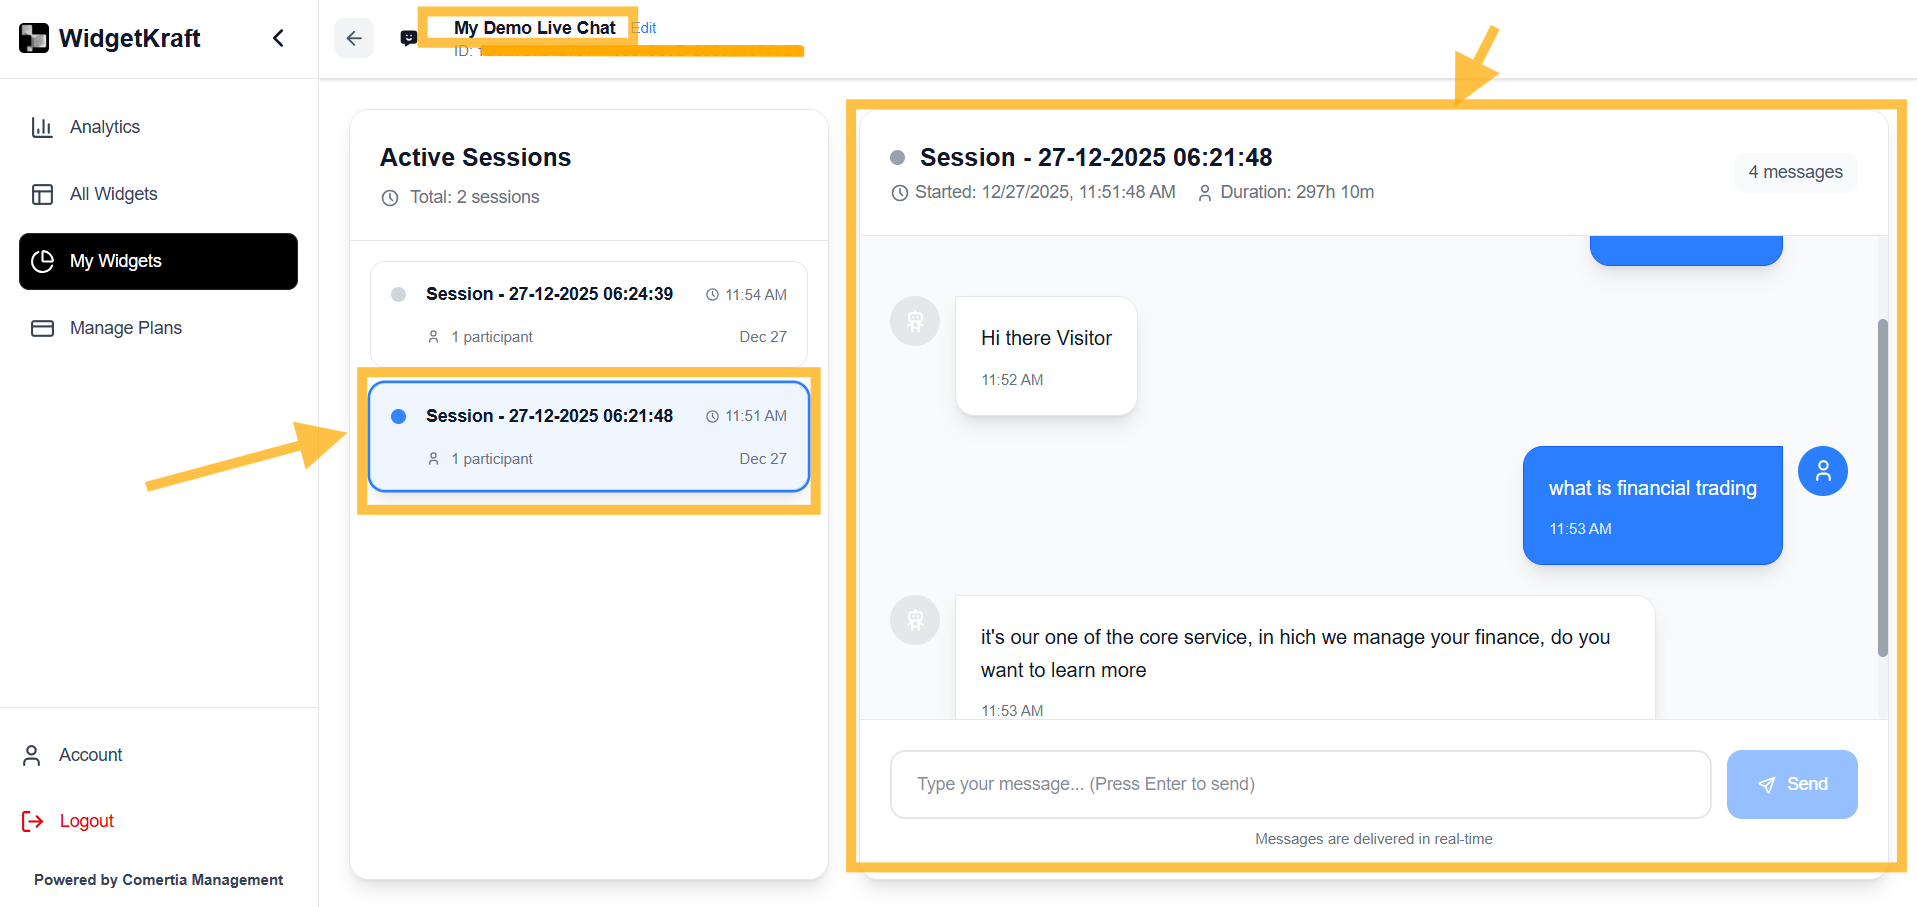
Live Conversation Tool
A real-time support tool that lets you chat instantly with website visitors, answer questions, and guide high-intent users from one place.
Pricing 1 credit / threadYou can fully customize
Shape the live chat flow while keeping the UI clean and readable.
Quick Start
Copy the snippet for your stack and paste it into your project your live chat widget is live in under a minute.
Paste this snippet into any HTML file before the closing </body> tag.
1<!-- 1. Add this where you want the live chat to appear -->
2<div id="livechat-root"></div>
3
4<!-- 2. Load the widget script -->
5<script src="https://cdn.widgetkraft.com/livechat.js"></script>
6
7<!-- 3. Initialize the widget and set user -->
8<script>
9  window.addEventListener("load", function () {
10    if (!window.LiveChatWidget) return;
11
12    // Initialize widget
13    window.LiveChatWidget.init({
14      widgetId: "YOUR_WIDGET_ID"
15    });
16
17    // Set logged-in user
18    window.LiveChatWidget.setUser({
19      name: "John Doe",
20      email: "john@example.com",
21      unique_id: "user_123"
22    });
23  });
24</script>YOUR_WIDGET_ID with the ID from the Code tab of your live chat editor. setUser is optional remove it for anonymous visitors.Creating a Live Conversation tool
Four steps from the dashboard.
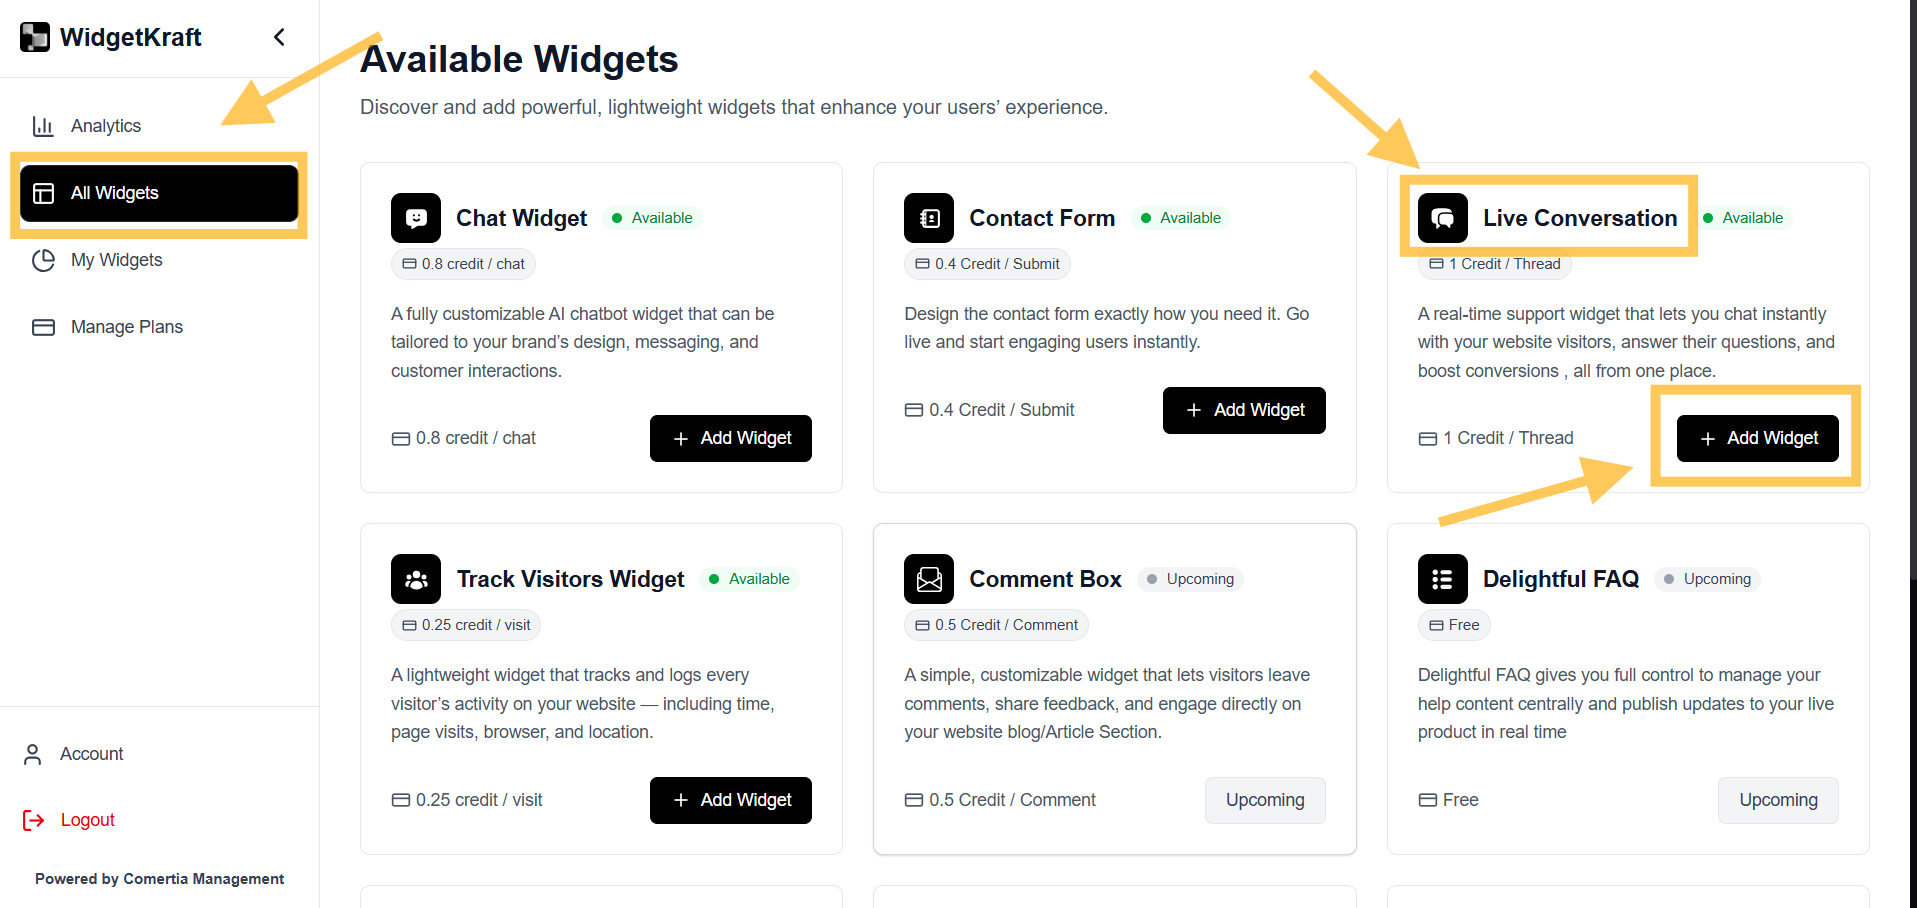
- 1Go to Available Tools -> Live Conversation
- 2Click Add Tool
- 3Configure the tool in the editor
- 4Copy the embed code to your site
Understanding the editor
Five configuration tabs.
Header
Title, subtitle, and greeting
Chat
Bubble styling and readability
Input
Message field and send action
Appearance
Dimensions and overall style
Code
Embed snippet
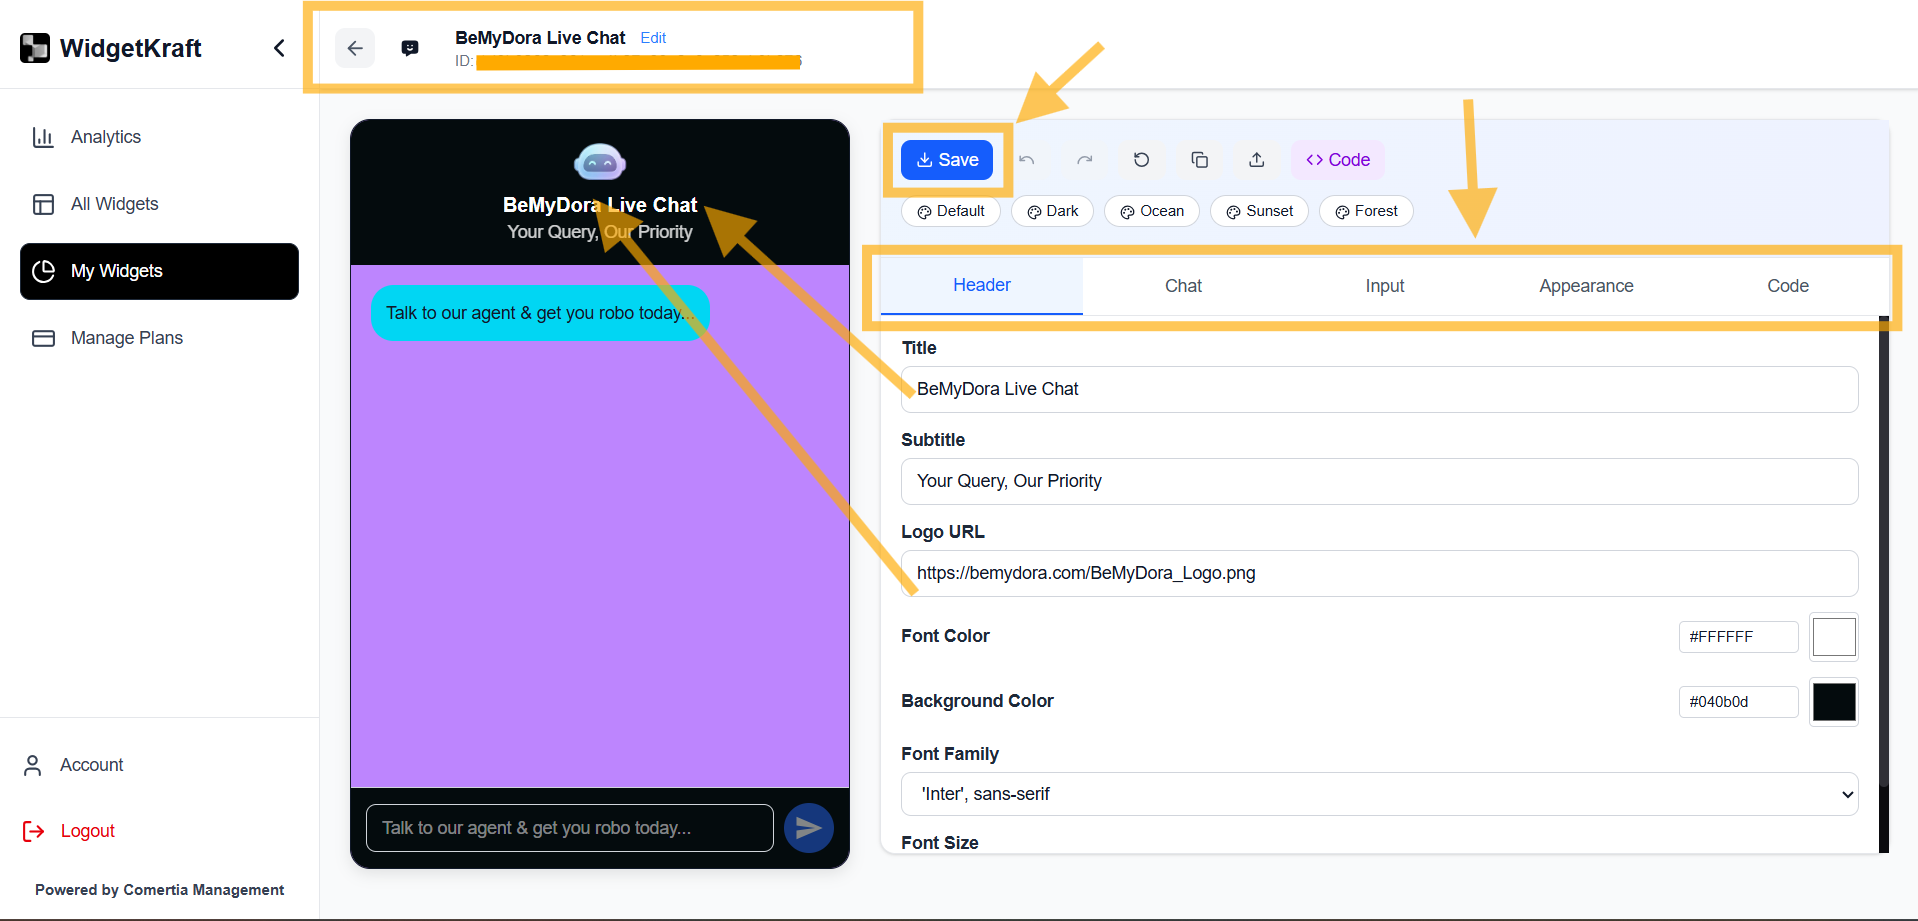
Header tab
Control the top section of the chat experience.
Header settings
- Chat title and subtitle
- Welcome message
- Branding and logo treatment
- Consistent text hierarchy for readability
Chat tab
Adjust how messages appear in the conversation.
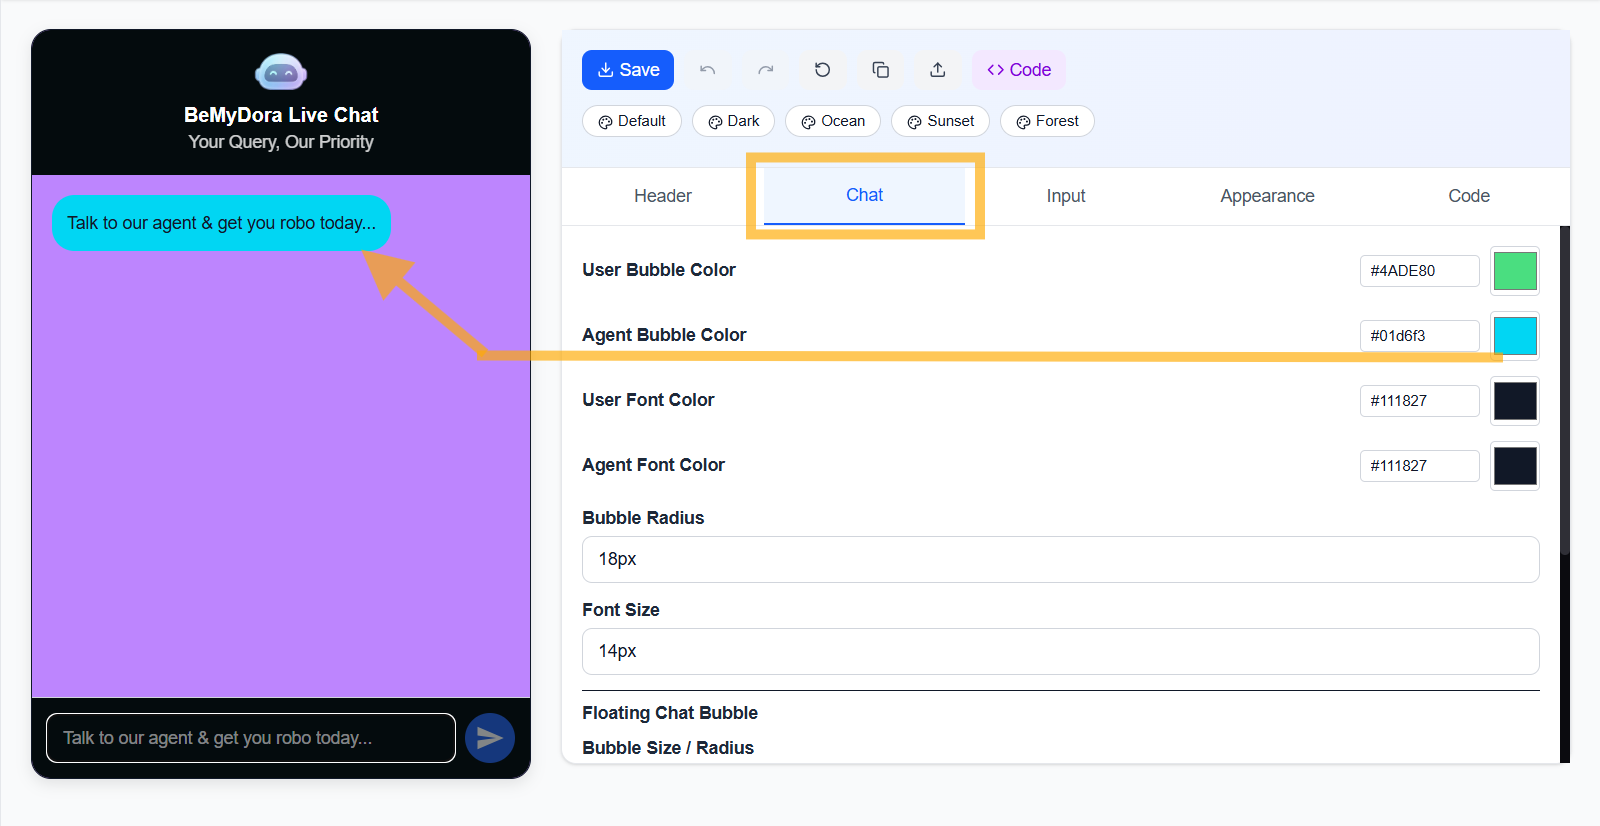
Design tip
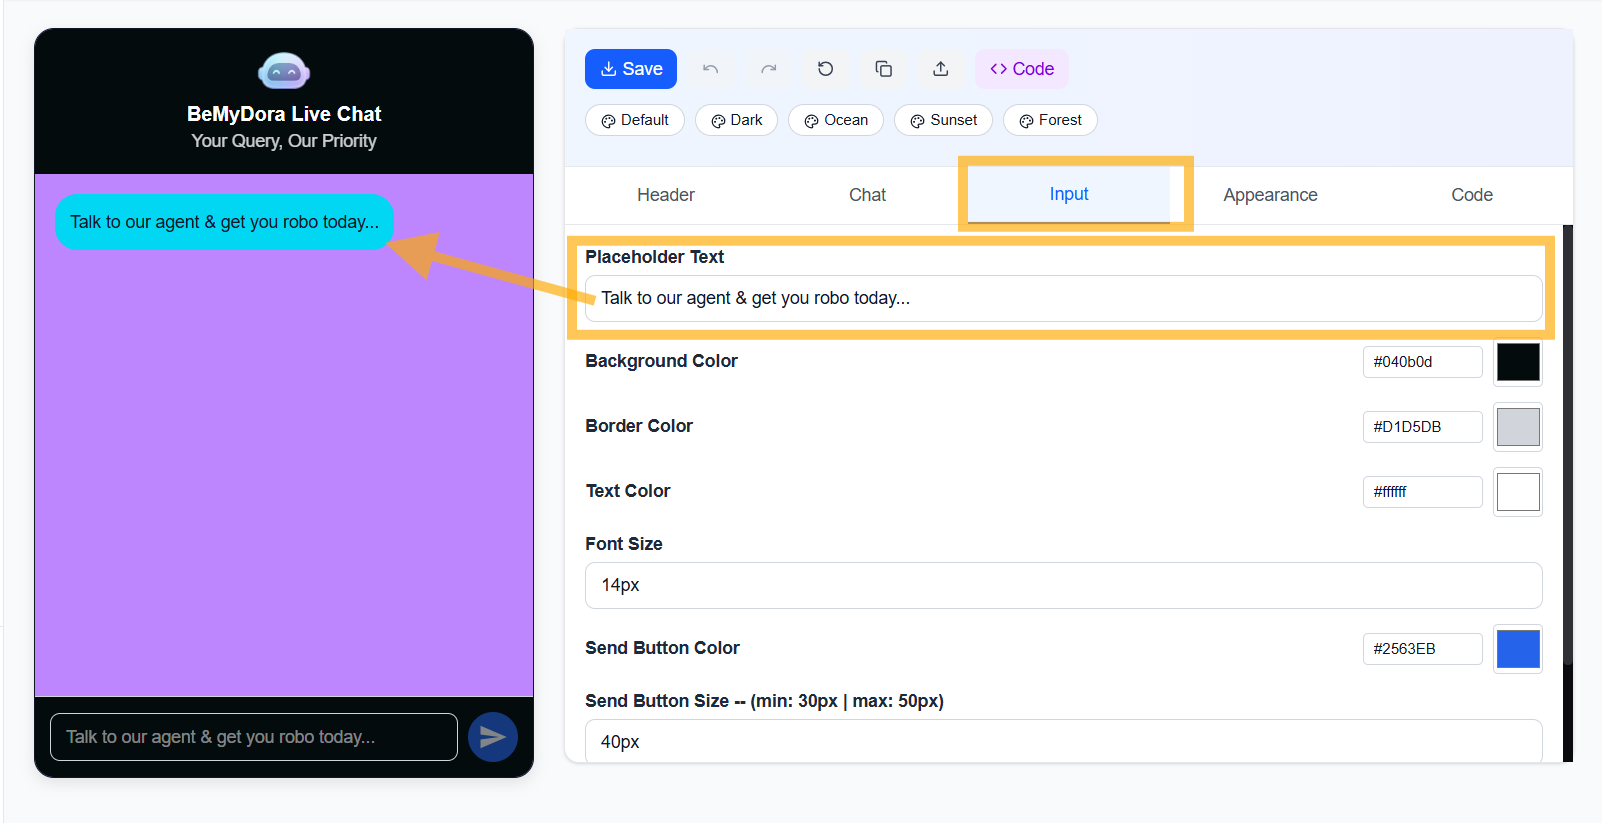
Prioritize contrast and spacing over decorative color choices so conversations stay easy to scan.Input tab
Configure the message field where visitors type.
Appearance tab
Set size, proportions, and overall UI treatment.
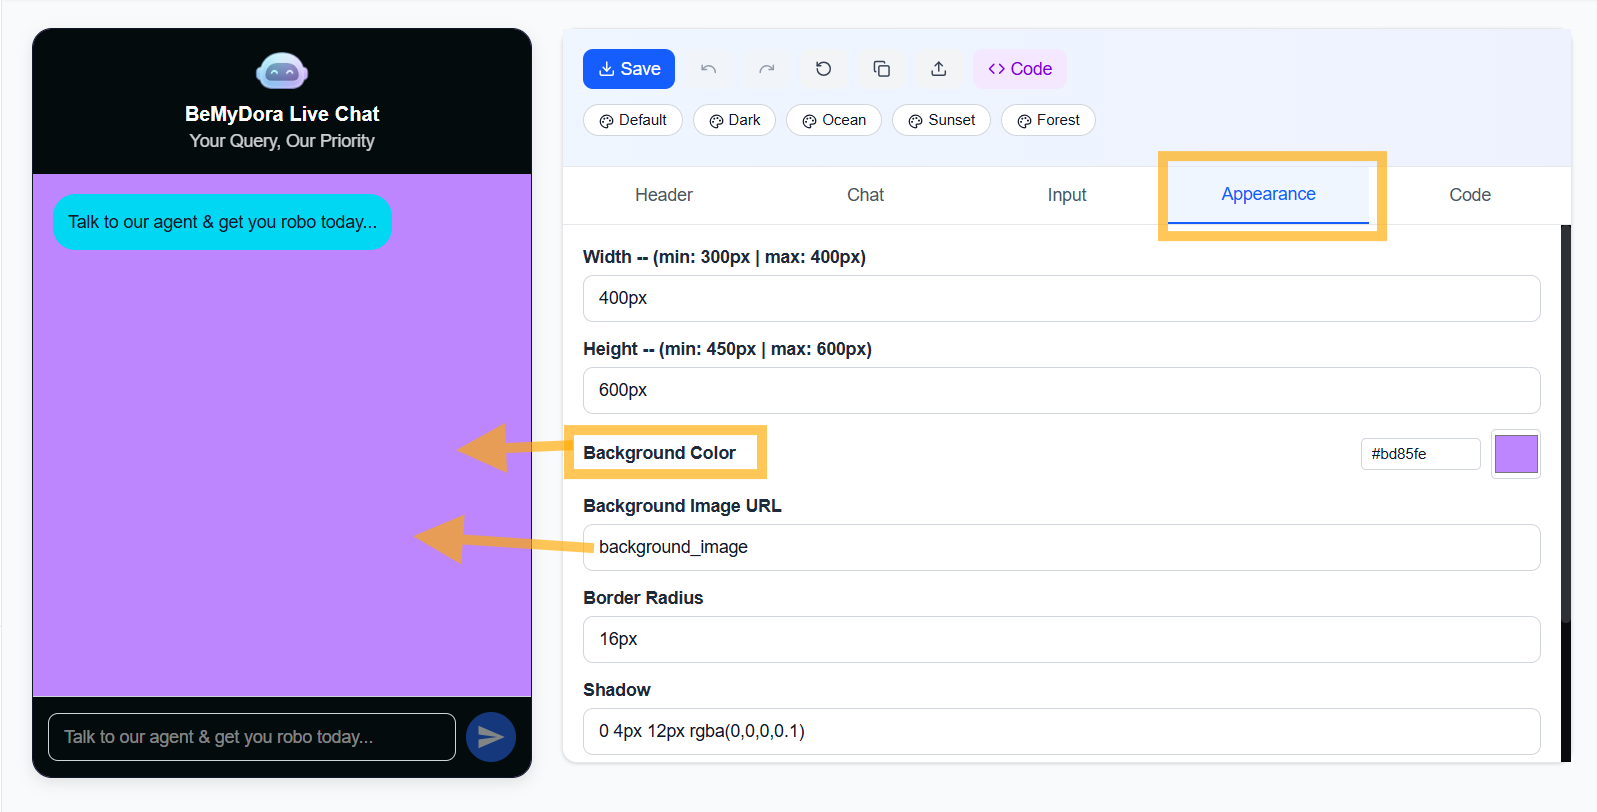
What matters most
- Chat window width and height
- Background, radius, and shadow settings
- Consistent appearance with your site
Code tab
Copy the embed code and go live.
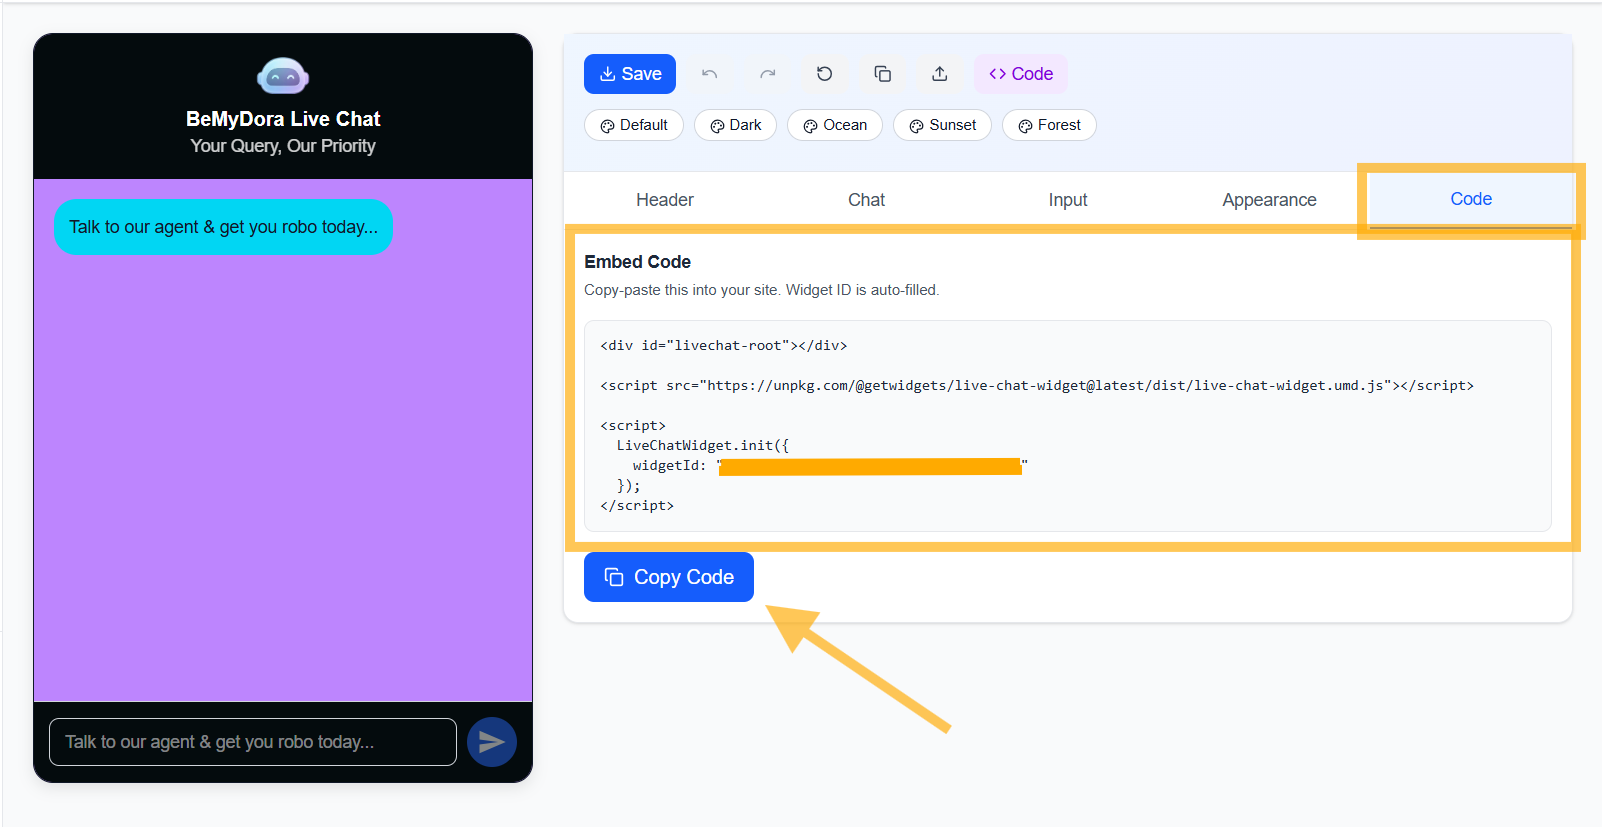
Using the embed code
- 1Copy the snippet from the Code tab
- 2Paste it before the closing body tag so it loads site-wide
- 3Publish the page and visitors can open the chat from the floating button
Summary
The Live Conversation Tool lets you: