Contact Form Tool
The Contact Form Tool lets you collect structured leads, inquiries, and messages directly from your website without building backend logic or managing multiple form tools.
Pricing 0.4 credit / submissionYou can fully customize
All submissions are captured inside your WidgetKraft dashboard.
Quick Start
Copy the snippet for your stack and paste it into your project your contact form is live in under a minute.
Paste this snippet into any HTML file before the closing </body> tag.
1<!-- 1. Add this where you want the contact form to appear -->
2<div id="contactform-root"></div>
3
4<!-- 2. Load the widget script -->
5<script src="https://cdn.widgetkraft.com/contact.js"></script>
6
7<!-- 3. Initialize with your Widget ID -->
8<script>
9  ContactFormWidget.init({
10    widgetId: "YOUR_WIDGET_ID",
11    mode: "inline"
12  });
13</script>YOUR_WIDGET_ID with the ID found in the Code tab of your contact form editor. Change mode to "popup" to show the form as an overlay instead.Creating a Contact Form tool
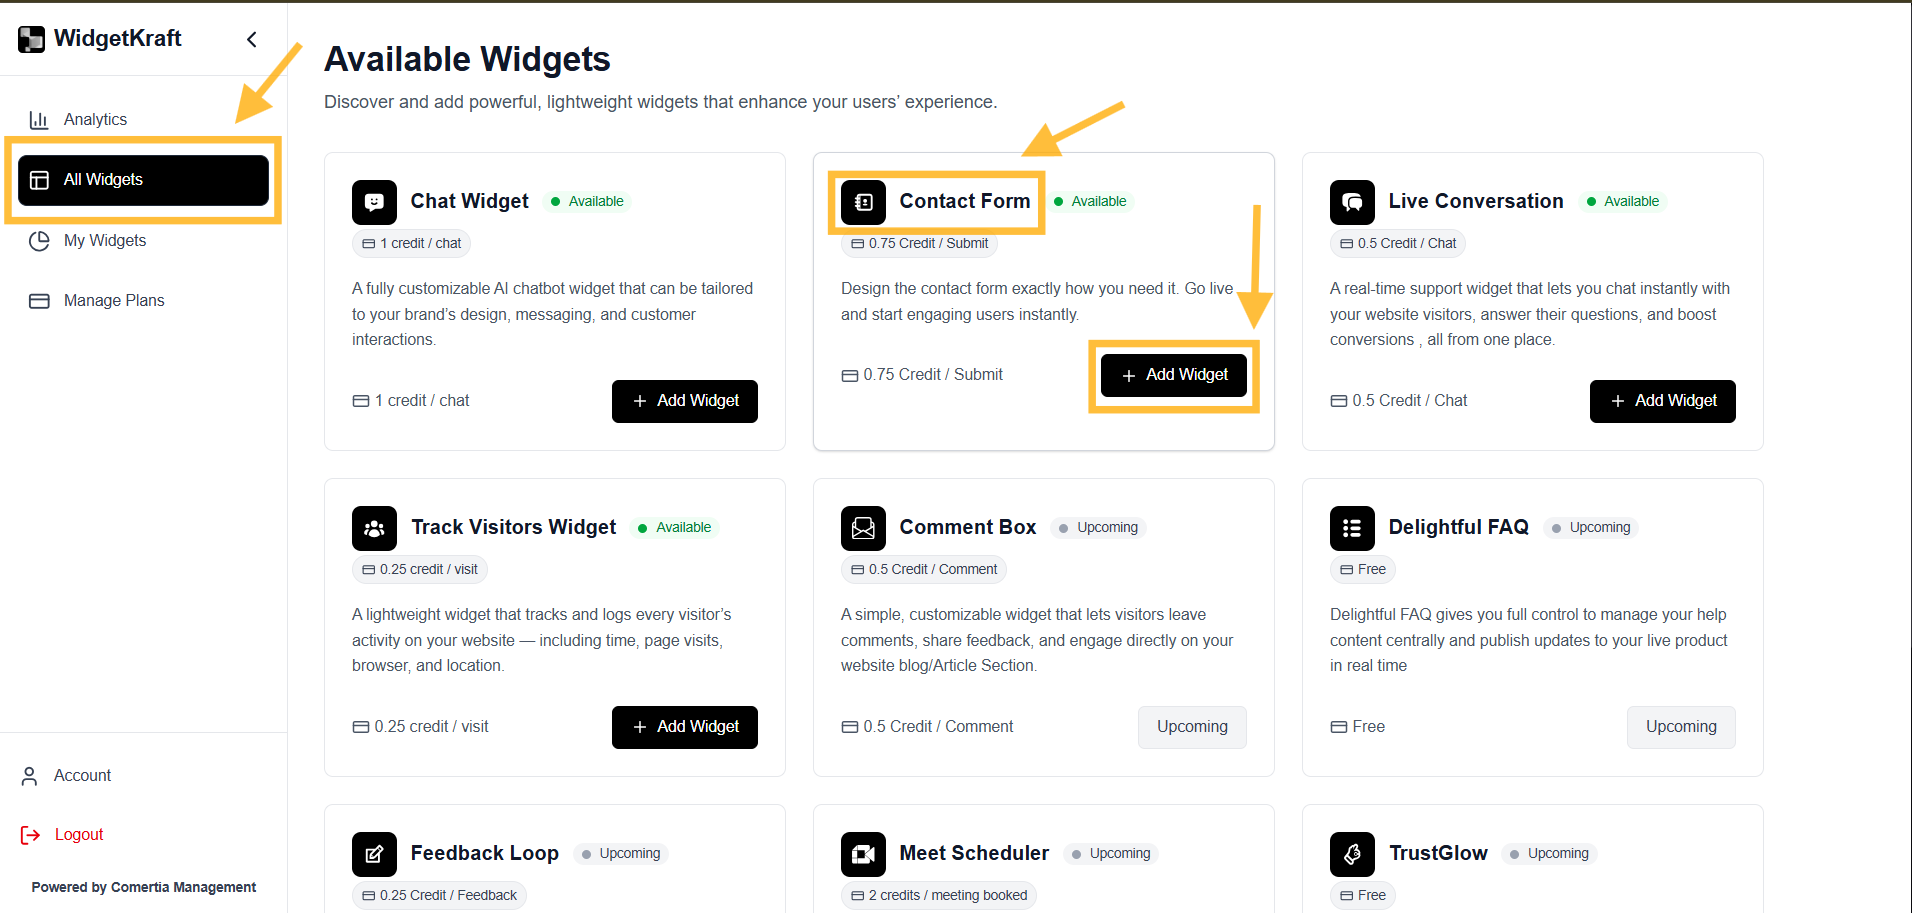
Four steps from the dashboard.
- 1Go to All Tools -> Contact Form
- 2Click + Add Tool
- 3Go to My Tools -> Contact Form
- 4Click Configure
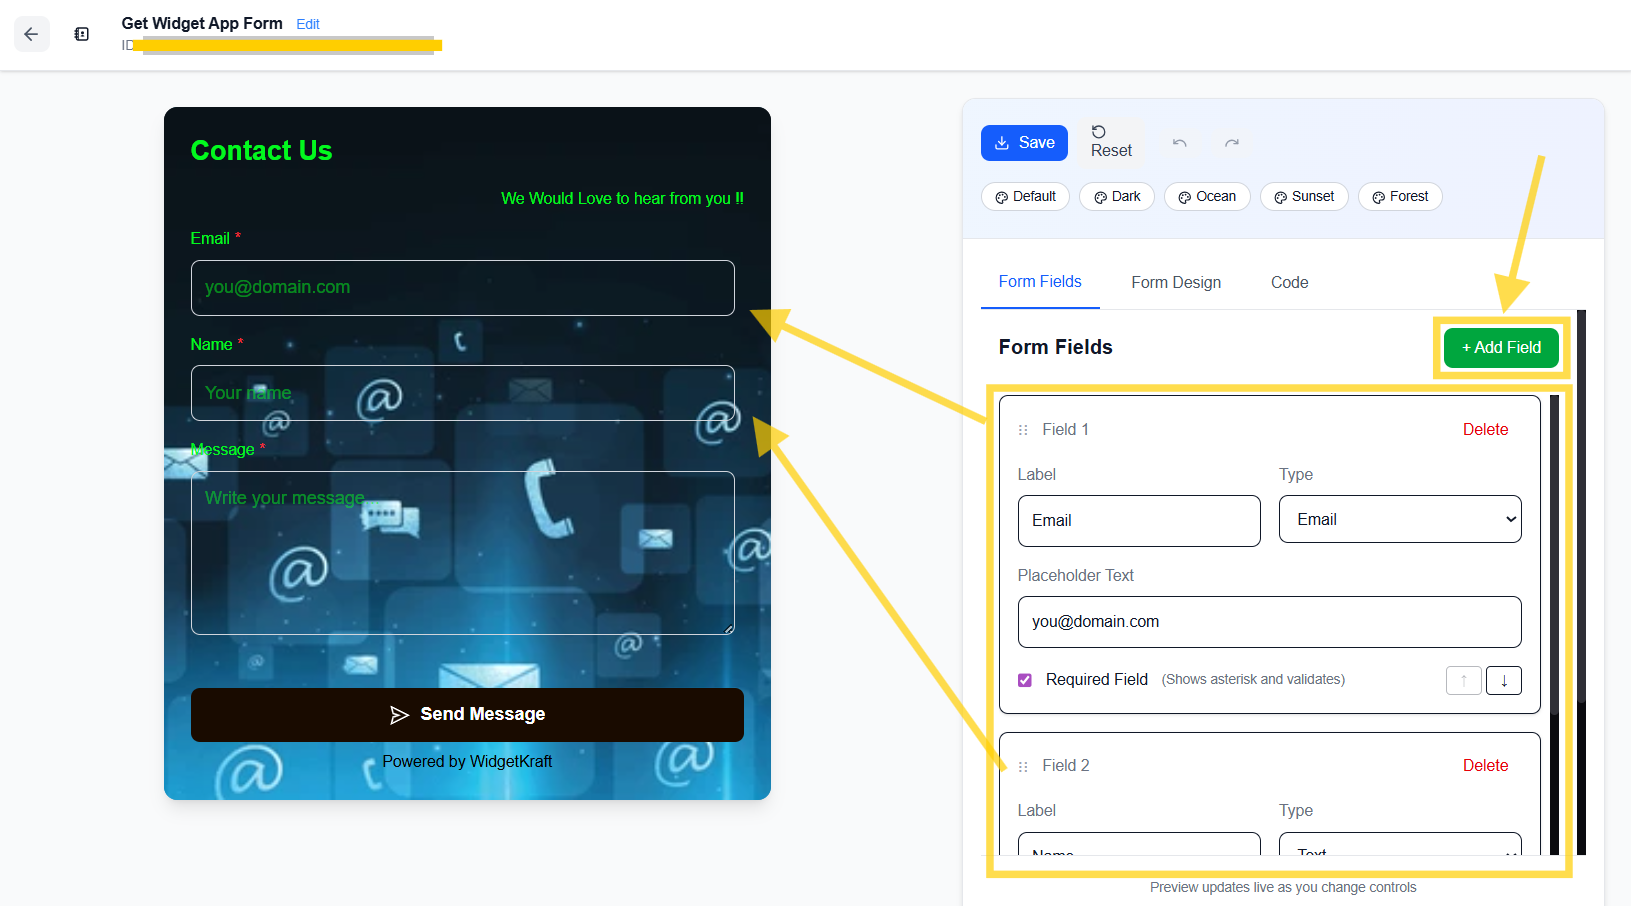
The form editor opens with a live preview on the left and controls on the right. Every change updates the preview instantly.
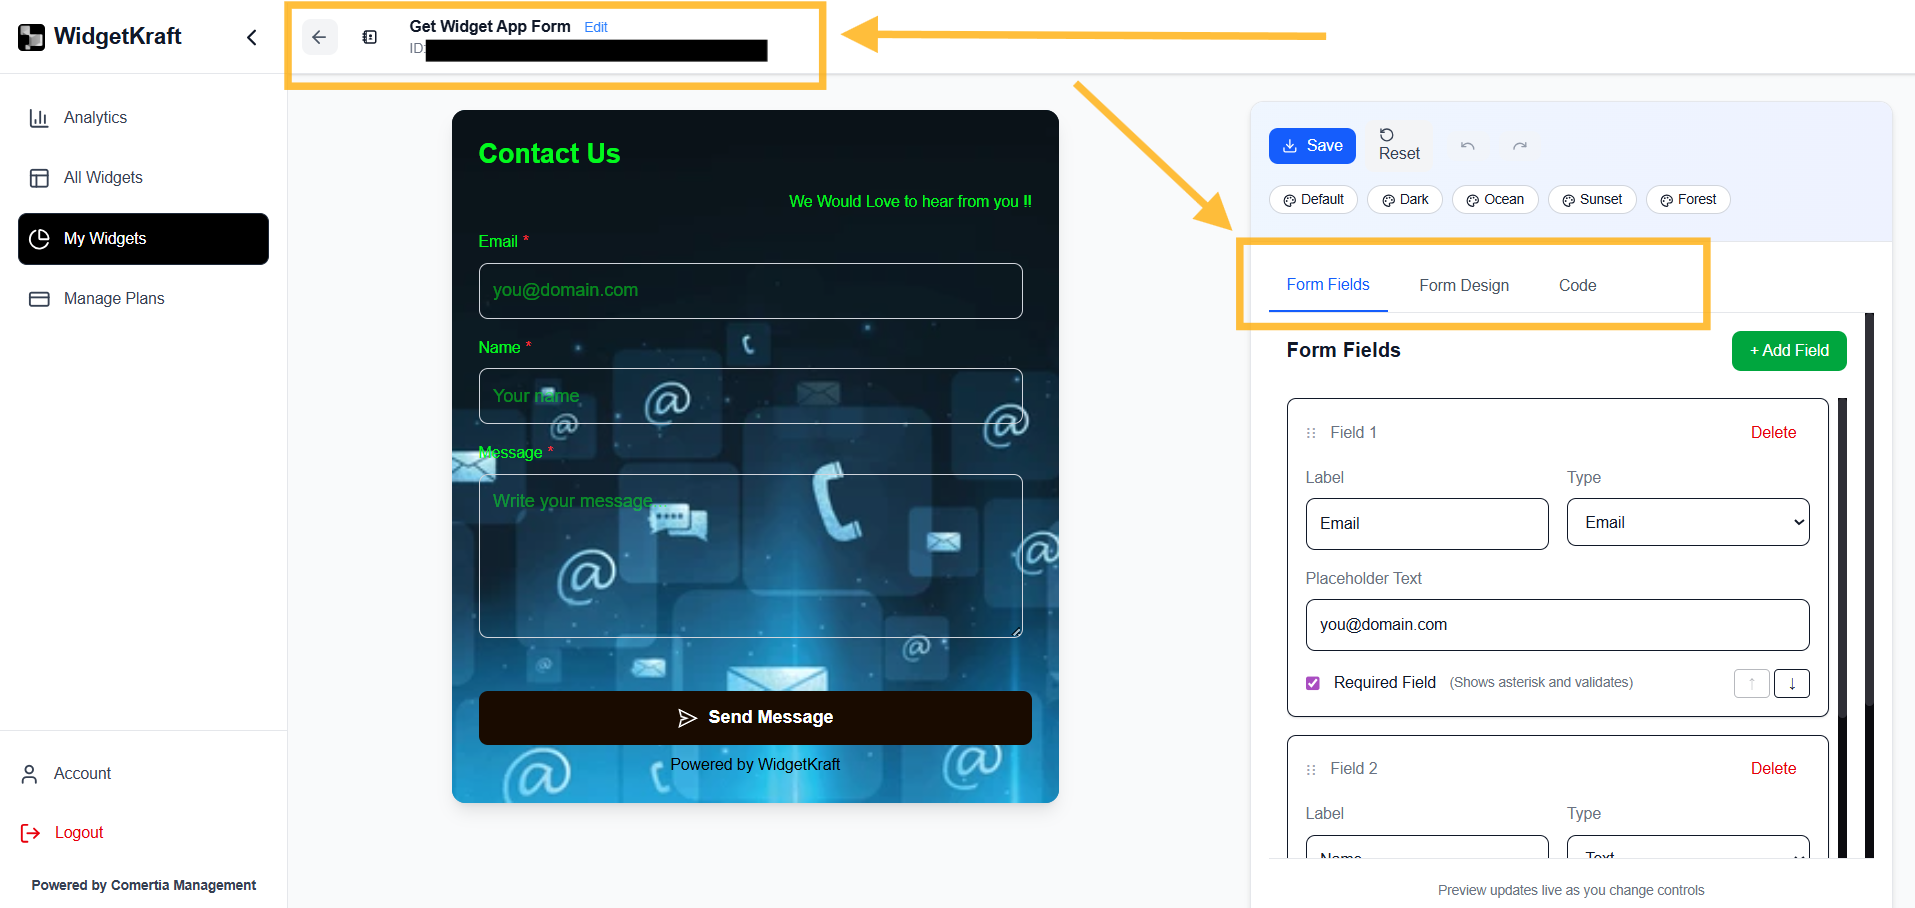
Understanding the form editor
Three core areas.
Fields
What data you collect
Design
How the form looks
Code
How you embed it
Fields tab
Control the structure of your form.
What you can control
- Add, remove, and reorder fields
- Choose field types like Email, Text, and Textarea
- Set labels, placeholders, and required states
Best practice
Keep forms short, usually three to five fields, to improve submission rates.Design tab
Adjust text, presets, and final appearance.
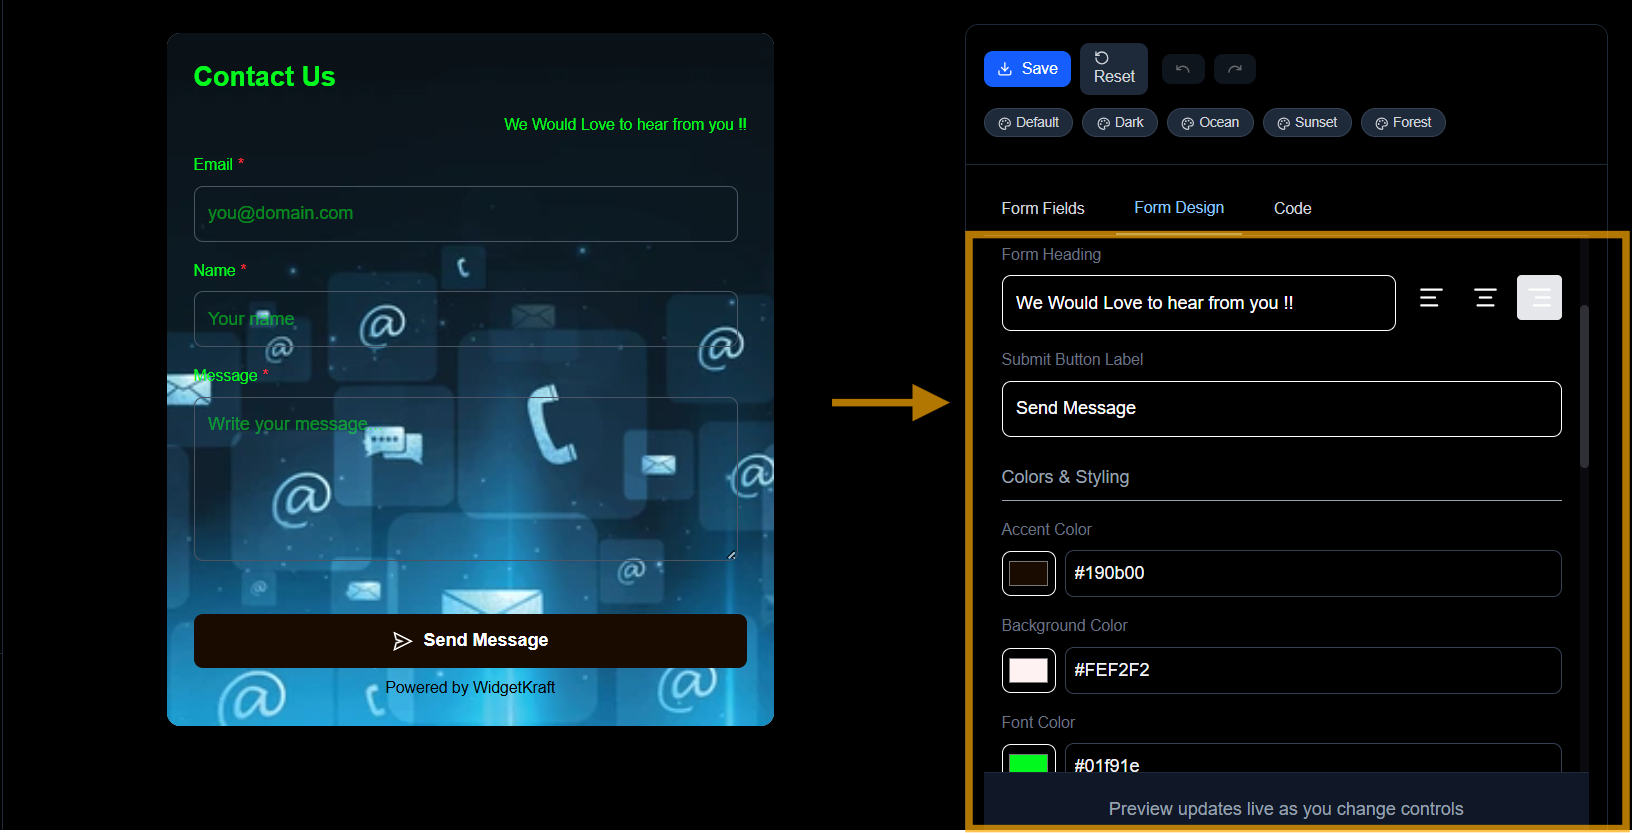
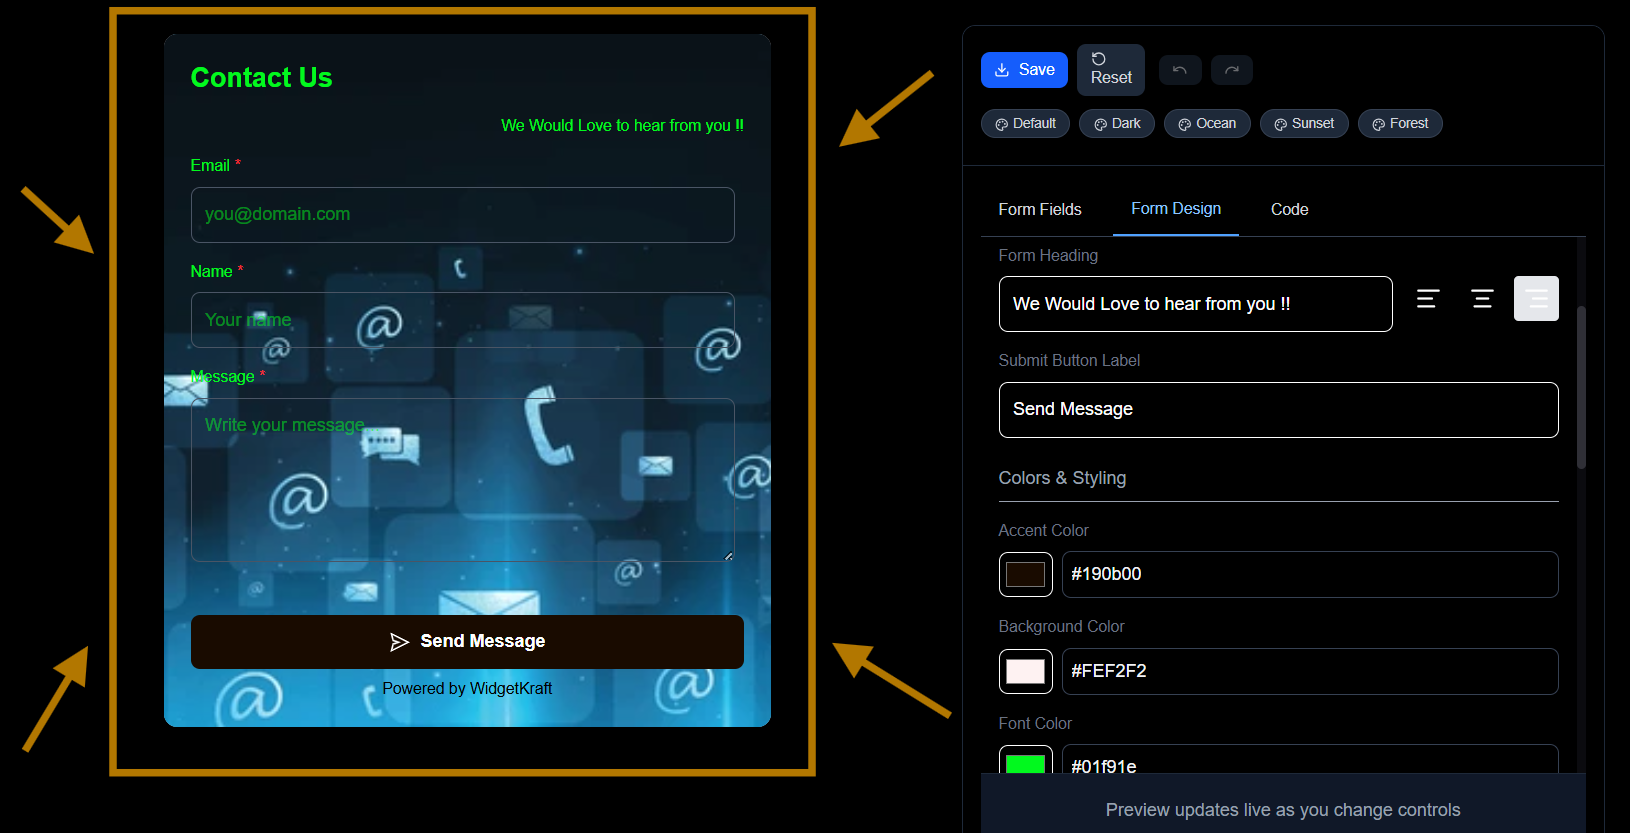
Useful adjustments
- Form title and subtitle
- Submit button label
- Preset themes and manual color adjustments
- Background and text contrast for readability
Code tab
Copy the embed snippet and publish.
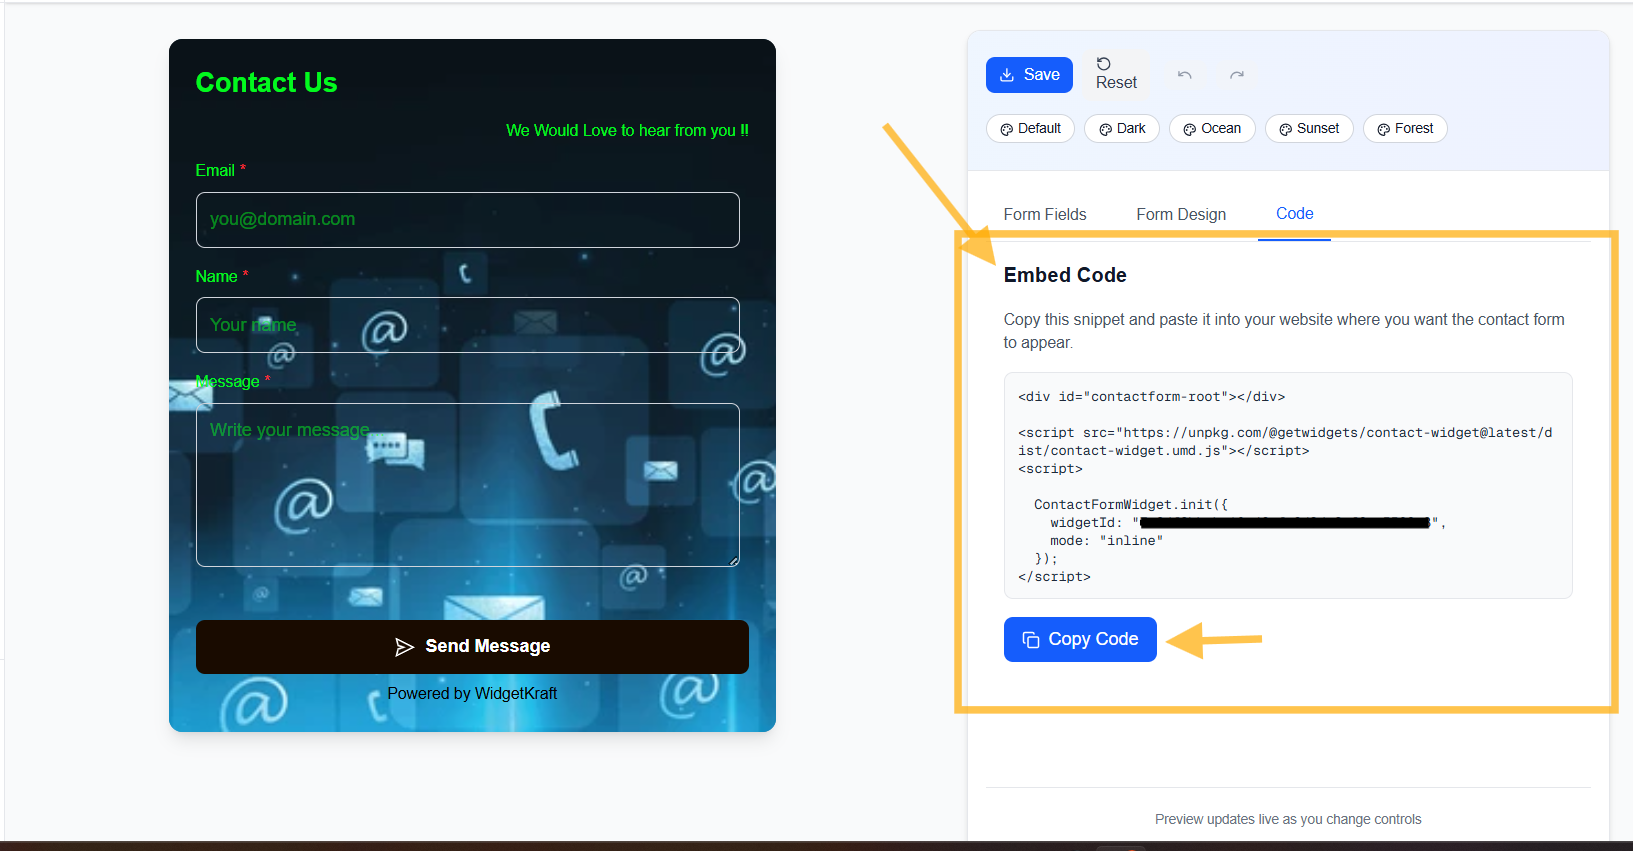
Using the embed code
- 1Open the Code tab and copy the generated snippet
- 2Paste it into the page section where the form should appear
- 3Publish the page and start collecting submissions immediately
Summary
The Contact Form Tool lets you: